Active directory features and policies revision
AD Policies
To better protect the production environment of WWTC, we will leverage features within Windows and AD to include BitLocker, BranchCache, and Windows Deployment Services to name a few.
The first three features to be enabled are BitLocker related. The following information will configure the features BitLocker for Windows Devices, Network Unlock, and BitLocker drive encryption type. To configure BitLocker, the machines must have an onboard TPM, and the correct Group Policies need to be configured. Refer to section XVI: AD GPO Implementation for specifics on creating the GPOs. In the Group Policy Management Editor, the BitLocker Policies are found under Computer Configuration\Policies\Administrative Templates\Windows Components\BitLocker Drive Encryption. The specific policy configurations for BitLocker are seen in Table 1.1 below. Note: Some policies may be located in the Fixed Data Drives or Operating System Drives folders.
Table 1.1
| Policy Name | Policy Configuration |
| Require additional authentication at startup | Enabled - Require startup PIN with TPM |
| Allow network unlock at startup | Enabled |
| Configure minimum PIN length for startup | Enabled - 8 digits |
| Disallow standard users from changing the PIN or password | Enabled |
| Standard User Individual Lockout Threshold | Enabled - 20 minutes |
| Standard User Lockout Duration | Enabled - 3 attempts |
| Deny write access to fixed drives not protected by BitLocker | Enabled |
| Enforce drive encryption type on fixed data drives | Enabled - Full disk encryption |
| Enforce drive encryption type on operating system drives | Enabled - Full disk encryption |
| Choose how BitLocker-protected operating system drives can be recovered | Enabled - Store recovery password and key packages |
| Choose default folder for recovery password | Enabled |
| Configure TPM platform validation profile for native UEFI firmware configurations | Enabled |
The next feature to install and configure is BranchCache with BranchCache Security. BranchCache Security is installed with BranchCache, so additional configurations are not necessary. To install the BranchCache feature, make sure the account being utilized is at least a member of the Server Administrators group.
Right-click on the Windows logo and select Windows PowerShell (Admin). If only the Command Prompt (Admin) option appears, right-click the taskbar at the bottom of the screen and select Properties. Open the Navigation tab and check the box that reads Replace Command Prompt with Windows PowerShell…
Once Administrator: Windows PowerShell has opened, enter the command Install-WindowsFeature BranchCache –IncludeManagementTools. The installation will begin and display a progress bar with percentage.
Upon completion, a status will be displayed and will show either True or False under Success (as seen below).
![Active directory features and policies revision 1]()
Enter Enable-BCHostedServer –RegisterSCP to configure the server as the Hosted Cache Service Connection Point in Active Directory. Note: This cannot be configured on writable domain controllers.
To verify that BranchCache is running and configured for HostedCache mode, enter Get-BCStatus.
Now that the feature has been installed and configured, group policy options must be configured for the computers to utilize the BranchCache server. Refer to section XVI: AD GPO Implementation for specifics on creating the GPOs.
In the Group Policy Management Editor, the specific items for BranchCache can be found under Computer Configuration\Policies\Administrative Templates\Network\BranchCache. The policies should be configured as listed in Table 1.2 below.
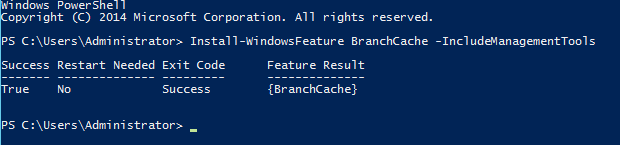
Table 1.2
| Policy Name | Policy Configuration |
| Turn on BranchCache | Enabled |
| Enable Automatic Hosted Cache Discovery by Service Connection Point | Enabled |
| Set BranchCache Hosted Cache mode | Enabled – [BranchCache Server Name] |
Moving forward, Failover Clustering will be configured. Failover Clustering will allow services to be live migrated from a failed server to an active server, in order to preserve the service and avoid interruptions. To install Failover Clustering, the user must have Administrator rights on all servers designated for the role, as well as permissions to Create Computer objects in the OU that the servers will reside in.
Right-click on the Windows logo and select Windows PowerShell (Admin). If only the Command Prompt (Admin) option appears, right-click the taskbar at the bottom of the screen and select Properties. Open the Navigation tab and check the box that reads Replace Command Prompt with Windows PowerShell…
Once Administrator: Windows PowerShell has opened, enter the command Install-WindowsFeature Failover-Clustering –IncludeManagementTools. The installation will begin and display a progress bar with percentage. This step needs to be repeated on all member servers of the Failover Cluster.
Upon completion, a status will be displayed and will show either True or False under Success (as seen below).

Create the cluster by entering New-Cluster –Name CN=NewYorkCluster,OU=Cluster,DC=WWTC,DC=com –Node [x],[x] where [x] is the name of the nodes to be added to the cluster.
To verify the cluster configurations, enter Test-Cluster –Node [x],[x] where [x] is the name of the nodes to be tested.
Add the File Server role to the cluster by entering Add-ClusterFileServerRole –Storage “Cluster Disk 1”.
Finally, add the generic application role for the Stock and Bond Analytical application by entering Add-ClusterGenericApplicationRole –CommandLine StockandBondAnalytical.exe.
The next feature to be installed is the File Server Resource Manager, which will allow the configuration of the File Classification Infrastructure.
Right-click on the Windows logo and select Windows PowerShell (Admin). If only the Command Prompt (Admin) option appears, right-click the taskbar at the bottom of the screen and select Properties. Open the Navigation tab and check the box that reads Replace Command Prompt with Windows PowerShell…
Once Administrator: Windows PowerShell has opened, enter the command Install-WindowsFeature FS-Resource-Manager. The installation will begin and display a progress bar with percentage.
Upon completion, a status will be displayed and will show either True or False under Success (as seen below).

Next the Microsoft Data Classification Toolkit needs to be downloaded from Microsoft and installed. Once downloaded, double-click the .msi file and follow the prompt to install.
Once installed, click on the Windows Logo, then click the dropdown to view all applications. Find the Data Classification Toolkit Classification Wizard and click it.
On the Wizard, select Import the classification configuration to a staging file server and click next.
If the staging file server is different than the machine you are currently logged into, enter the correct name, otherwise leave localhost as the value and click next.
Enter the location for the baseline files to be utilized for classification. The NIST SP 800-53 will be selected from the Data Classification Toolkit folder, which can be found at C:\Program Files (x86)\Microsoft\Data Classification Toolkit\NIST SP 800-53 Classification Package Example.xml. Leave all default radio options selected and click next.
At the next step, select Convert global properties to local properties, then click next.
Leave the default expiration folder name, and click next.
At this step, leave the default for Use settings from Baseline Configuration selected, and click next.
For the AD RMS Support, do not change this, as this option is specifically for Windows Server 2008 R2, not Server 2012 and later.
In the credentials field, if using the administrator account, select Use the current credentials. If not logged in as administrator, select Use different credentials, and enter the administrator credentials to be used, then click next.
Verify that the settings look correct, and click Configure.
At this point, open the Windows Server Manager and select the Tools dropdown. Choose the File Server Resource Manager, alternatively, this can be opened from Windows Logo, then Administrative Tools.
Once in the File Server Resource Manager expand Classification Management, then Classification Rules.
Specify the rules to be enabled, as well as the volumes to be protected by identifying the drives under the Scope option. All the classification values will need to be populated to protect the required data.
The next feature to be configured is IP Address Management (IPAM). IPAM administers and monitors IP addresses for ease of network management, as it automatically discovers used and available IP addresses within the configured scopes.
Right-click on the Windows logo and select Windows PowerShell (Admin). If only the Command Prompt (Admin) option appears, right-click the taskbar at the bottom of the screen and select Properties. Open the Navigation tab and check the box that reads Replace Command Prompt with Windows PowerShell…
Once Administrator: Windows PowerShell has opened, enter the command Install-WindowsFeature IPAM -IncludeManagementTools. The installation will begin and display a progress bar with percentage.
Upon completion, a status will be displayed and will show either True or False under Success (as seen below). At this point, the server will need to be restarted.
![Active directory features and policies revision 4]()
Once the server has restarted, in the Windows Server Manager select IPAM on the left.
From the IPAM Server Tasks select Provision IPAM server.
Follow the wizard and select Windows Internal Database (WID) and enter the location for the database, then click next.
Change the default option from Group Policy Based to Manual, then click next.
Click Apply after verifying the configurations.
Once the configurations have been applied, on the IPAM Overview within Server Manager click on Configure Server Discovery.
Within the Configure Server Discovery window, select the domain (WWTC.com) and check the boxes for the desired services to monitor. Leave all three default options checked (Domain Controller, DHCP Server, and DNS Server). Click Ok.
On the IPAM Overview within Server Manager click on Start Server Discovery.
Once the discovery has been completed, on the IPAM Overview page, click on the Server Inventory to view the discovered servers.

Next, the power of Smart Cards will be leveraged to provide two-factor authentication for the WWTC network. Smart Cards will provide access to WWTC computers, e-mail encryption certificates, and signing certificates for non-repudiation.
Open Windows Server Manager, click the Tools dropdown, and select Group Policy Management.
Expand the Forest: WWTC.com object, then expand Domains, then expand WWTC.com. Right-click on Default Domain Policy and click Edit.
In the Group Policy Management Editor navigate down to Computer Configuration\Policies\Windows Settings\Security Settings\Local Policies\Security Options. Configure the Interactive logon: Require smart card as enabled.
Close the Group Policy Management Editor and ensure the Default Domain Policy is enforced.
Finally, we move on to the Windows Deployment Service (WDS) feature. The WDS not only provides ease of imaging for systems, to include bare metal installs, it also provides support for BitLocker Network Unlock.
Right-click on the Windows logo and select Windows PowerShell (Admin). If only the Command Prompt (Admin) option appears, right-click the taskbar at the bottom of the screen and select Properties. Open the Navigation tab and check the box that reads Replace Command Prompt with Windows PowerShell…
Once Administrator: Windows PowerShell has opened, enter the command Install-WindowsFeature WDS -IncludeManagementTools. The installation will begin and display a progress bar with percentage.
Upon completion, a status will be displayed and will show either True or False under Success (as seen below).
![Active directory features and policies revision 5]()
Once WDS has been installed, open the Server Manager, click the Tools dropdown, and then select Windows Deployment Services. Click the dropdown for Servers, right click the current server and select Configure Server.
Click next in the wizard, then leave Integrate with Active Directory selected, and click next.
Enter the path where the remote installation images will be hosted. This will not be the system volume, so an extended drive will be used. Enter E:\RemoteInstall, then click next.
Select Respond to all client computers (known and unknown) and also check the box reading Require administrator approval, then click next.
Once the wizard has finished configuring WDS, uncheck Add images to the server now and click finish.
Once the client image has been built and sysprep has been run on it, the image can be imported into WDS for installation.


