I have enclosed the problems I need done. Each one needs to be saved on a seperate file.
Lab 6: Dimensioning/Auxiliaries
You will probably want to print this page so you have a hard copy to refer to as you complete the lab assignment.
Before completing this lab, make sure that you view Topic 6-1. You do not make the template in the book; you need to make the template in Topic 6-1.
Put the following fully dimensioned multiview drawings on a title block in the Layout tab. Use the title block from the template you created in 6-1. Do not create the title block in the book.
Using AutoCAD, create fully dimensioned multiview drawings of the following three objects from the AutoCAD textbook by Shih. Make sure to use layers for different line types.
Each item must have its one file.
The Bracket on page 6-6
![I have enclosed the problems I need done. Each one needs to be saved on a seperate file. 1]()
The Geneva Cam on page 7-15
(Start on page 7-15, do not create title block in Chapter 7, and use the title block in the template you created earlier.)![I have enclosed the problems I need done. Each one needs to be saved on a seperate file. 2]()
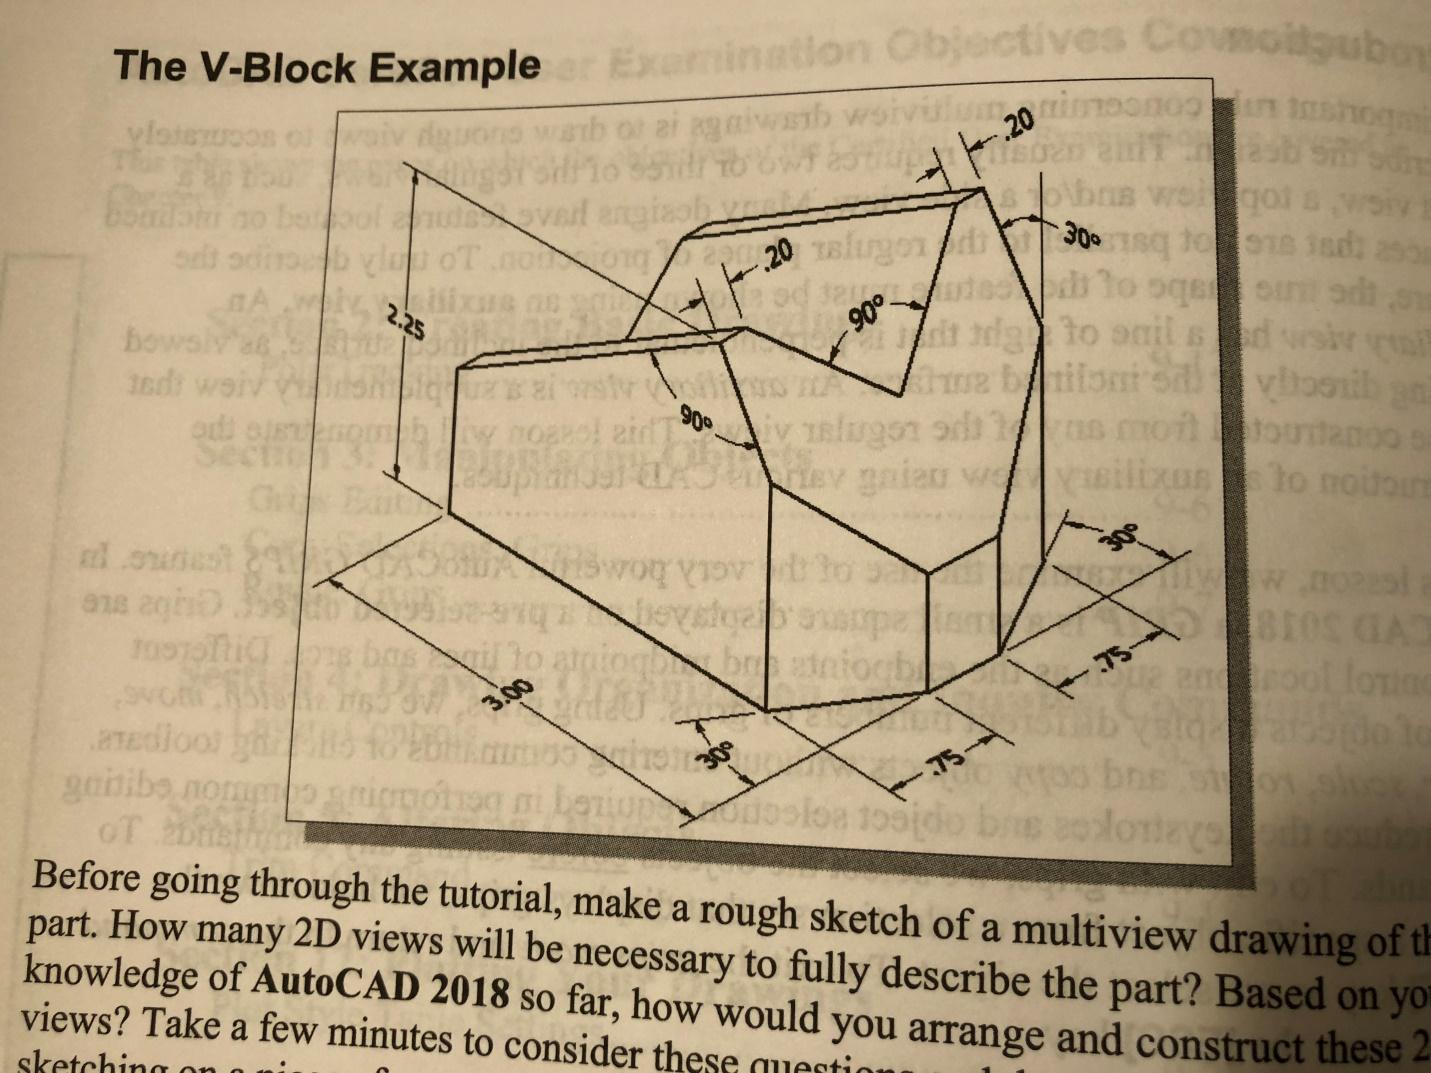
The V-Block on page 9-4
![I have enclosed the problems I need done. Each one needs to be saved on a seperate file. 3]()
Exercise 1 at the end of Chapter 6
![I have enclosed the problems I need done. Each one needs to be saved on a seperate file. 4]()
Exercise 3 at the end of Chapter 6
![I have enclosed the problems I need done. Each one needs to be saved on a seperate file. 5]()
Exercise 4 at the end of Chapter 7
![I have enclosed the problems I need done. Each one needs to be saved on a seperate file. 6]()


For Lab 6...
For chapter 6's tutorial and exercises, you need to create fully dimensioned multi-view drawings, although they DO NOT have to be put in a file that the model space shows up within the layout template.
Use the instructions in the Content area Topic 6-1 for creating a template with a proper viewport. Also set up all your layers in the template and save it as a template for all future drawings. This should be used for tutorials and exercises for chapter 7 and later. DO NOT CREATE THE TEMPLATE IN THE CHAPTER 7 TUTORIAL...START THAT TUTORIAL ON PAGE 7-15.
All multi-view drawings and dimensions should be created on the MODEL tab. Only the format/title block and viewport should be on the layout tab.
Save each drawing for this assignment as a default AutoCAD drawing file (*.dwg) and upload each file individually to the Lab 6 folder in the Lab 6 Dropbox folder Do not put your drawings into a *.zip file.
topic 6-1: Templates/Viewports
To avoid having to create layers each time you start a new drawing, a template that stores those layers can be created. Also, the template can store a title block to put the drawings on. These title blocks are located on the Layout tab seen near the bottom of the AutoCAD window. Drawings are still created in the Model tab and placed on the title block using a viewport. The viewport function will be described later.
You will be creating a template to use in your future assignments.
EGR110 Required Class Design Template
Below is the procedure to create the template you should use for the rest of the drawings created in this course. Do not create the title block shown in your book; use the title block outlined below.
Start AutoCAD.
Select Start Drawing; Template in the Startup dialog box (or create a new file and choose template from the dropdown menu).
Select TutorialiMfg.dwt and click OK.
Add the layers as shown on the Layers Setup page at the beginning of Chapter 6. (Do not create the Title Block and Viewport layers; use the existing layers in the template.)
Select the Layout tab at the bottom of the AutoCAD window.
Turn off the Title Block layer.
Select the existing viewport and delete. (A viewport will be added later.)
Turn on the Title Block layer.
Select the File menu and select Save As.
Save as "Drawing Template *.dwt" in the default AutoCAD folder using a filename you will remember.
Adding a Viewport
As stated above, the viewport is used to place a model drawing on a title block in the Layout tab. Remember to create the drawing in the Model tab. The tabs are located at the bottom of the AutoCAD window.
To place the drawing on the title block:
First, make sure you are in the Layout tab and set the current layer to Viewport.
Click the Layout Viewport menu, then Rectangular.
Create the viewport by clicking two corners of a rectangle within the title block.
To change the scale of the drawing in the viewport:
select the viewport, then right-click, and select Properties.
Scroll down to the Misc menu in the Properties dialog box to set the scale of the drawing.


