case study memo
Setting Line Spacing in Business Memos
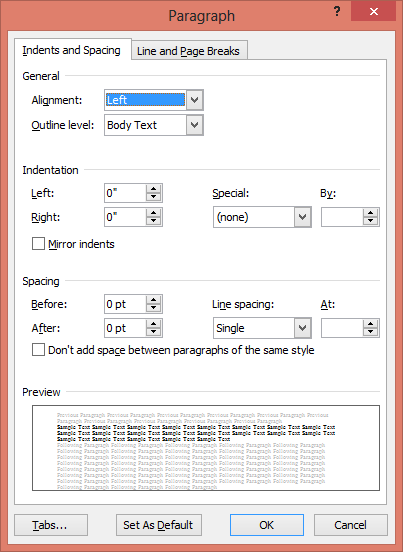
At the top of a document after you open it move the cursor to the top left corner and open the Paragraph dialogue box to set the spacing info and tab setting as shown below before you move forward with any other part of the memo. Then, click on the “Set a Default” button. Sometimes it stays, other times it does not. If you find you need to readjust to the setting below, put the cursor anywhere in the document, highlight the whole document (I use Ctrl + A), right click on the highlighted area/document, and click on Paragraph. The box below will open up, and set info as shown below. Also works for specific document areas.
At the top of a memo, where you double space the Date, To, From, and Subject, hit the Enter key twice to achieve the double spacing. Applies to other places in the memo where you need to double space between sections.


Correct spacing.
See directions below to change the tab setting to 0.15 from the standard setting.
Setting Tab Spacing to 0.15
For tab setting, set to 0.15, and don’t use 0.5, in the “Default tab stops:” area in the upper right corner. Hit OK. Provides more finite spacing with lists, outlines, etc.

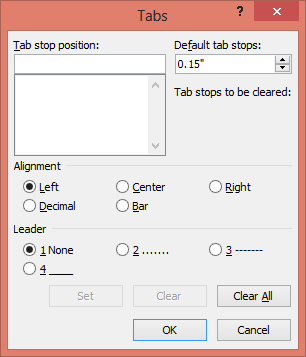
Change to this number from standard size.
Initial Formatting Memo Information
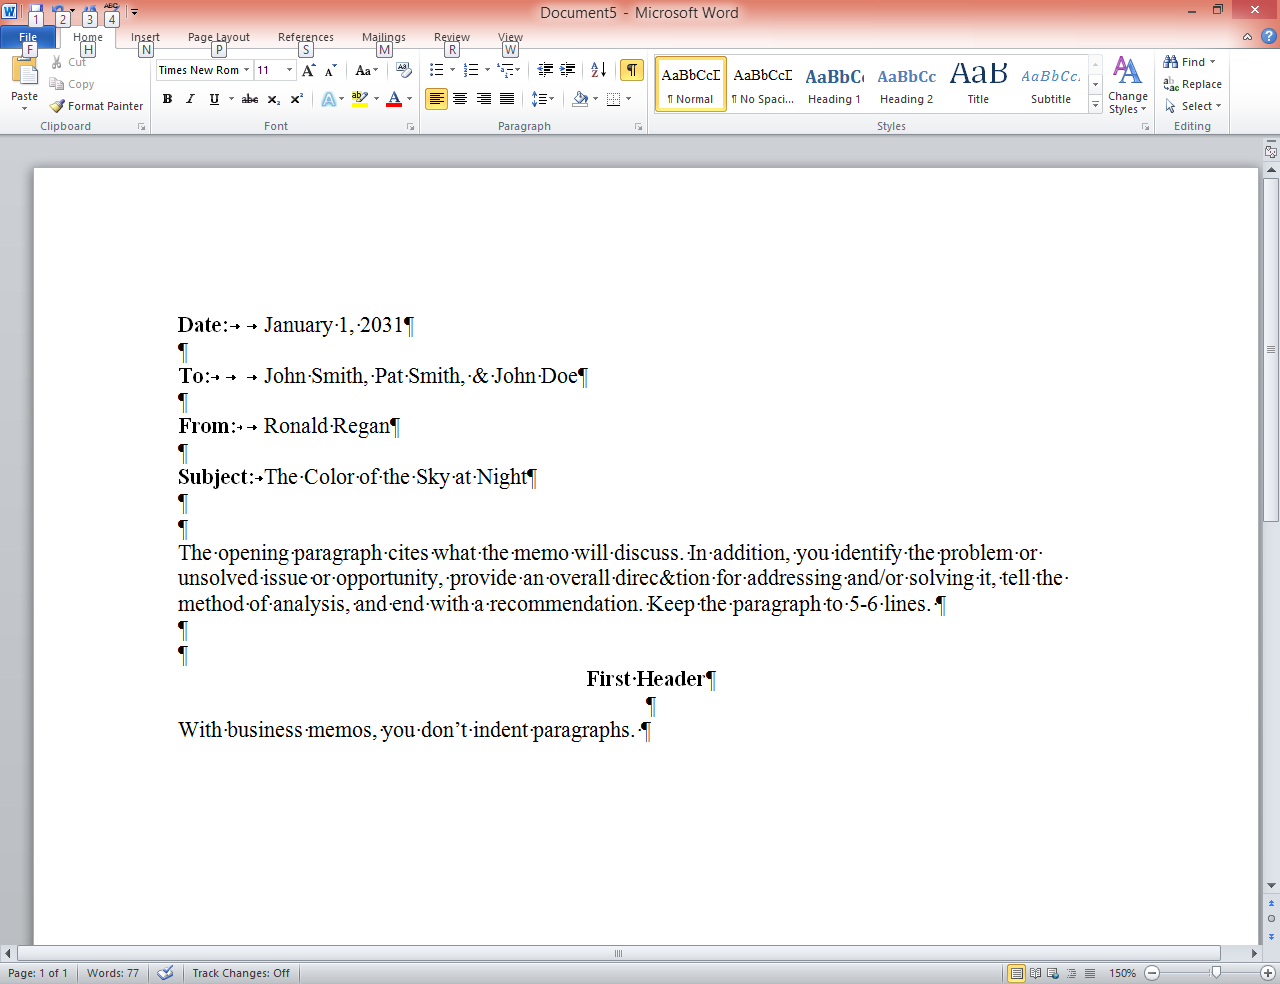
 When setting up a memo, you start with single line spacing and zero, as shown above. For the Date, To, From, and Subject, you hit the Enter key twice to produce the double space required in business memo writing. You tab over to generate the straight line effect when adding information after the colon, as shown below.

Click to show paragraph marks and other hidden formatting information.
Click again to hide information.
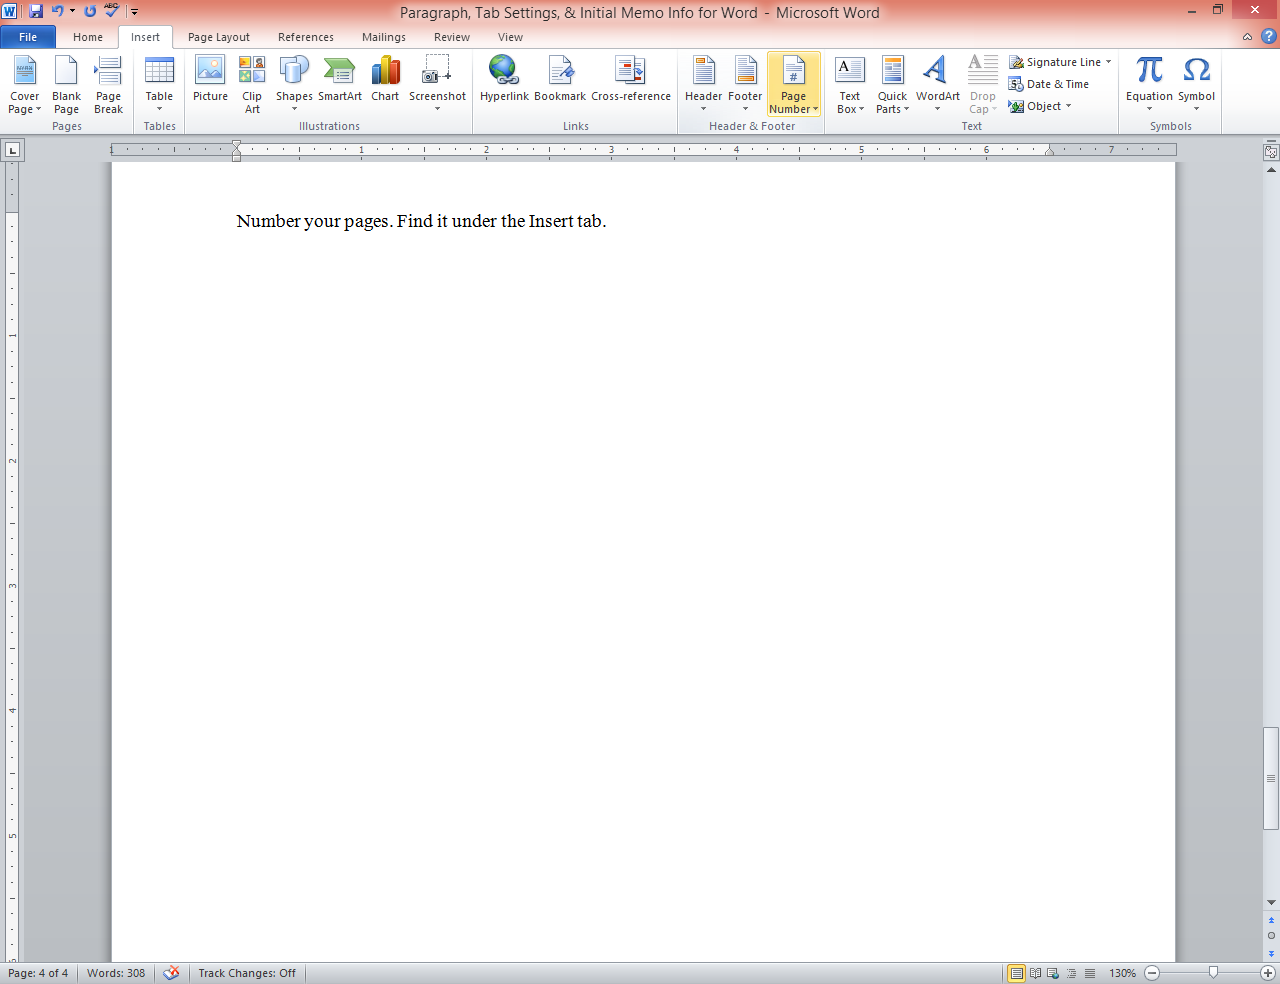
Numbering Pages
Number your pages. Find the number feature under the Insert tab, highlighted in yellow below will be the title Page Number.


Click on the arrow in the bottom right corner to select the desired pagination option and style.
Insert tab
Borders and Shading
Borders
Left click on the mouse in a highlighted section in a table to see a column pop up, and in the middle of the pop up you will see a row labeled Borders and Shading. Left click on Borders and Shading, and the box below will pop up. You have three options: Borders, Page Borders, and Shading. You can use the mouse to select one of the other tabs, or use the keyboard: Borders (Alt + B); Page Borders (Alt + P), or Shading (Alt + S), which you will see below.


 You have a selection of features: Style to select a line; Color to choose a color; Width to select how bold to make a line; and other features. Use these to enhance your tables.

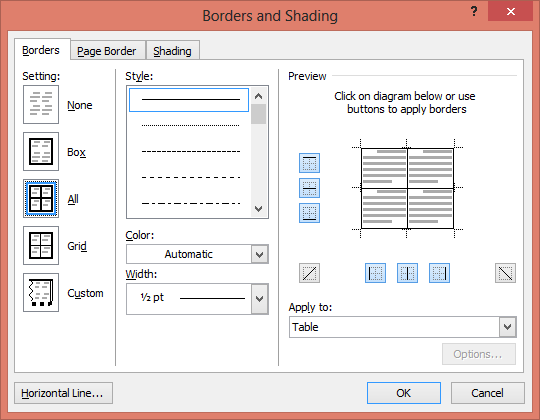
Click when done to add to the table.
Borders and Shading
Page Border
To enhance the border of a table, you have selections, similar to the choices above.

Border and Shading
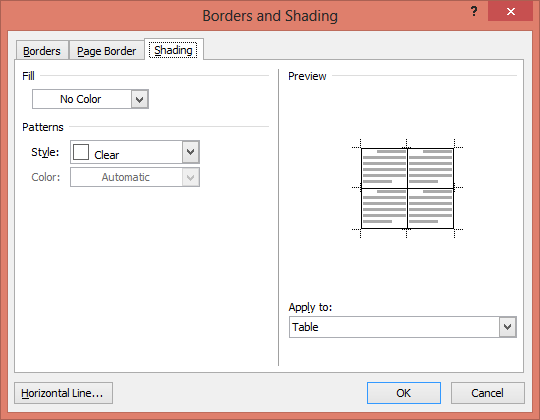
Shading
Use shading to highlight a table (rows or columns) to make information stick out. On the next page, you will see an example with more directions to design a table.
Patterns -- Style
One feature, as below, to use is highlighting a row (typically) or a column. Highlight the row or column, and follow the procedures to get to this pop up. When the dropdown box shows up you can select the percentages or place the cursor on the slide bar to select darker shading.


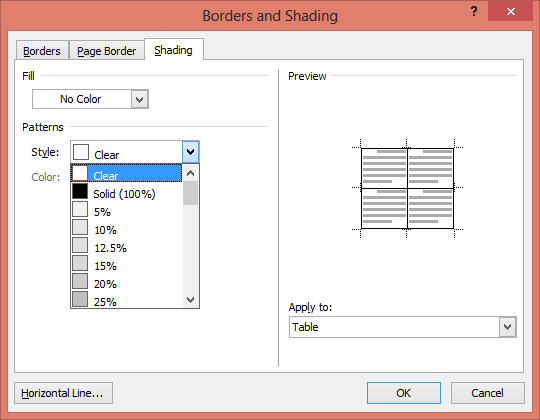
Place cursor on gray area and slide down.
Click to show dropdown box.
On the next page, find an example of the results of using the Border and Shading feature.
Table Example
You have a complete example of how to use table features. After practicing a few times, you will easily master these valuable skills. Don’t make the table the width of the page. You can move in the columns and end column lines with the cursor by finding two upright lines (||). Same applies to rows to adjust the width.
Table 1
DIRECTIONS FOR MAKING A TABLE IN WORD
| Right Click and Merge Cells. Make this top header black by right clicking and going to Boarders and Shading. Select the Shading tab, and make this 100% black. Lettering turns white and bold | ||
| Use this row for column headings | Use this row for column headings | Use this row for column headings |
| Insert info here | Insert info here | Insert info here |
Adding Rows and Columns
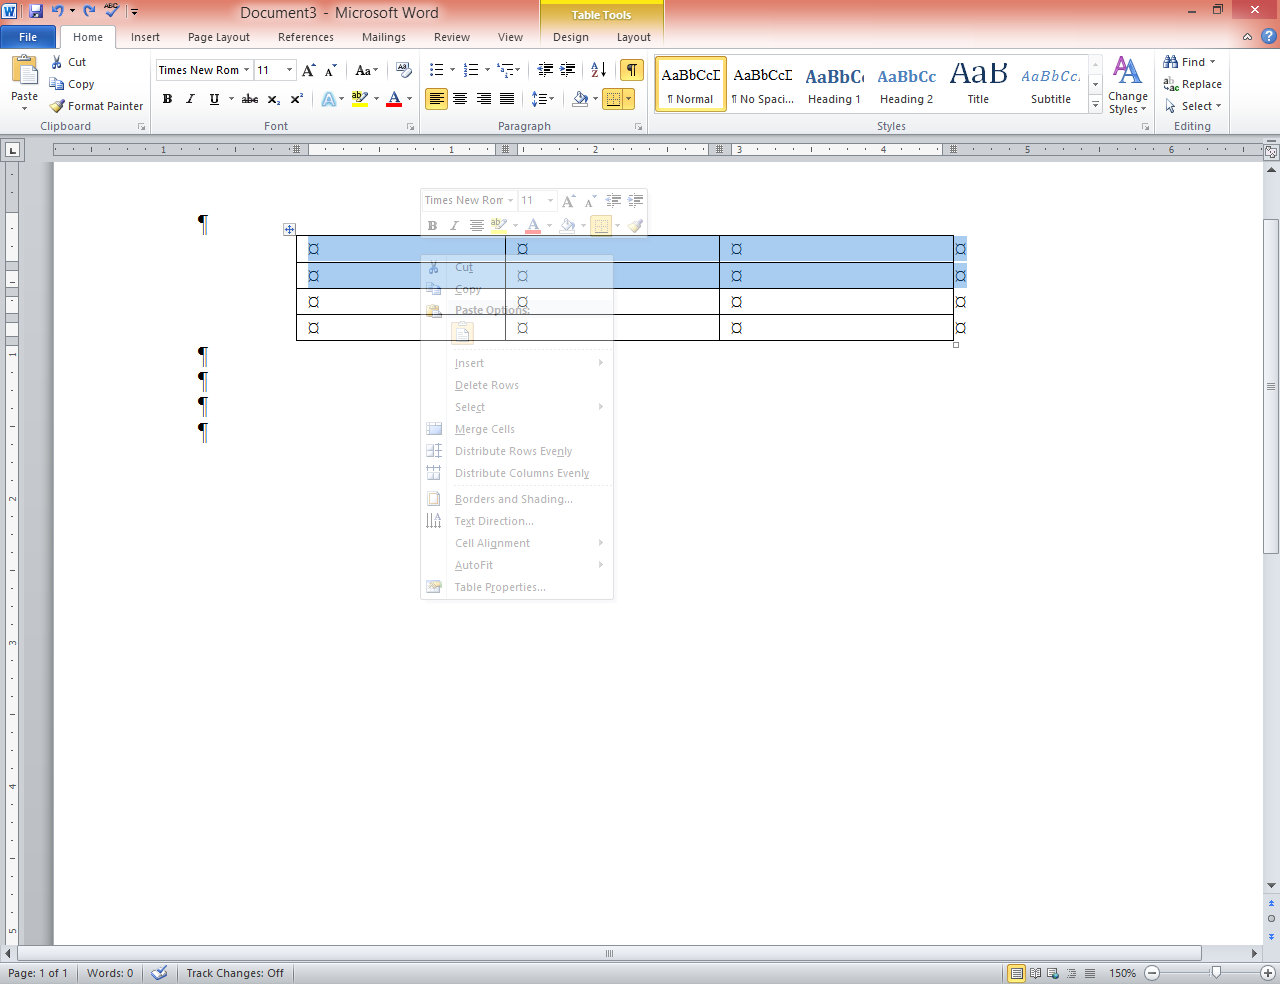
To add a row or rows, or a column or columns, highlight the rows or columns you want to add, per the light column below. I selected to add two rows. (Tried to capture a good Print Screen version before it fades was a challenge; you see a ghost here but get the picture about what to look for.)
In the pop up you see options to add rows. When you click on this item another pop up box will show to the right that give you options. Select the one you want.
To merge cells, use this feature for the top row that includes a title. Highlight the row, left click to show the pop up below, and right click on Merge Cells to make one large cell. To undo a merged cell or cells, see directions below.
To adjust how information looks in a cell or cells in a table, you have another feature: Cell Alignment. Highlight the cells you want to adjust how the information looks. Right click to show the pop up below, and move to Cell Alignment. When you place the cursor on the Cell Alignment area a pop up will show to the right, showing you nine examples. Move the cursor to one of the buttons, and right click on the button.


Cell Alignment
Merge Cells
Add rows
Split Cells
If you have a merged cell you want to undo, highlight the merged cell. You will see in the place of “Merge Cells” a line that says “Split Cells” as seen below. You have the option to return the merged cell to match the table or adjust the cells in a specific row, column, or rows and columns.

Page | 13


